Not much of a recipe but it is still my favorite pork dish that my mom used to make me.
The Recipe:
Honey Garlic sauce
Pork
Rice
1. Cut pork into small cubes
2. Brown pork in frying pan on medium-high heat
3. Poor honey garlic sauce into pan
4. As sauce boils, stir often (scrapping the bottom of the pan to avoid sticking)
5. The sauce is caramalized when there is separation ss you scrape across the pan with a spatula
6. The longer you cook it, the thicker the sauce gets (and the bigger mess there is to clean up)
7. Serve pork and sauce over rice
My Experience:
Easy recipe right? I told you so.
I prefer the VH brand for the honey garlic sauce but I doubt that it really matters. I use most of the bottle of sauce so that I have tons for my rice since it tastes so good.
The kind of pork doesn't matter either, mom used to always use pork chops but this time I used pork leg schnitzel because it was on sale.
As I said above, the longer you cook the sauce to caramalize it, the harder it is to clean everything. But it is TOTALLY worth it (although mom didn't always think so). Just have patience and soak the pan after (as I write this I have yet to clean my own pans so I might regret that statement later). The caramalized sauce will still be on the liquidy side while warm but it will start to solidify as it cools. So if people plan on going back for seconds, keep the pan on the burner on min so that it doesn't harden.
Wednesday, January 4, 2012

Tuesday, December 13, 2011
Slow-Cooker Beef Stew
Slow-cooker recipes are awesome for exam period. Start it in the morning while still groggy, come home from a 2pm to 5pm exam and it is all ready to eat while you are detoxing from information overload!
The Recipe:
2 lb (1 kg) stewing beef cubes
4 potatoes, peeled and cut in wedges
3 carrots, cut in chunks
2 onions, chopped
2 cloves garlic, minced
1-1/2 cups beef stock
1 can (5 oz/156 mL) tomato paste
1 bay_leaf
1 tbsp Worcestershire sauce
1 cup frozen peas
1/2 tsp salt
1/4 tsp pepper
2 tbsp all-purpose flour
1. Trim and cut beef into 1-inch cubes
2. In 18- to 24-cup (4.5 to 6 L) slow-cooker, mix together beef, potatoes, carrots, onions, garlic, beef stock, tomato paste, bay leaf and Worcestershire sauce
3. Cover and cook on Low for 10 to 12 hours (or on High for 5 to 6 hours) or until beef and vegetables are tender
4. Add peas, salt and pepper
5. Increase heat to High
6. Whisk flour with 2 tbsp water; stir into stew
7. Cook, covered, for 5 minutes or until thickened
8. Discard bay leaf
My Experience:
So I followed this recipe mostly. I didn't add peas (I don't like peas) but I added 1 turnip cut in wedges.
I'm also not a huge fan of tomatoes so I probably wouldn't have the tomato paste next time. It tastes more like tomatoes than I thought it would.
I didn't try it but the original recipe suggests to serve the stew in bread bowls (hollow out a crusty bun, leaving 1/2-inch thick shell) and have vanilla pudding with peaches for dessert. Benig exam period, I was too lazy to do the bread bowl and instead served warm pillsbury crescents.
I got this recipe from Canadian Living (I'm going to try to start posting where I get the recipe from)
The Recipe:
2 lb (1 kg) stewing beef cubes
4 potatoes, peeled and cut in wedges
3 carrots, cut in chunks
2 onions, chopped
2 cloves garlic, minced
1-1/2 cups beef stock
1 can (5 oz/156 mL) tomato paste
1 bay_leaf
1 tbsp Worcestershire sauce
1 cup frozen peas
1/2 tsp salt
1/4 tsp pepper
2 tbsp all-purpose flour
1. Trim and cut beef into 1-inch cubes
2. In 18- to 24-cup (4.5 to 6 L) slow-cooker, mix together beef, potatoes, carrots, onions, garlic, beef stock, tomato paste, bay leaf and Worcestershire sauce
3. Cover and cook on Low for 10 to 12 hours (or on High for 5 to 6 hours) or until beef and vegetables are tender
4. Add peas, salt and pepper
5. Increase heat to High
6. Whisk flour with 2 tbsp water; stir into stew
7. Cook, covered, for 5 minutes or until thickened
8. Discard bay leaf
My Experience:
So I followed this recipe mostly. I didn't add peas (I don't like peas) but I added 1 turnip cut in wedges.
I'm also not a huge fan of tomatoes so I probably wouldn't have the tomato paste next time. It tastes more like tomatoes than I thought it would.
I didn't try it but the original recipe suggests to serve the stew in bread bowls (hollow out a crusty bun, leaving 1/2-inch thick shell) and have vanilla pudding with peaches for dessert. Benig exam period, I was too lazy to do the bread bowl and instead served warm pillsbury crescents.
I got this recipe from Canadian Living (I'm going to try to start posting where I get the recipe from)
Friday, November 25, 2011
Hamburger Casserole
Kind of like shepherd's pie, minus the veggies, plus cheese :) in other words, way better than shepherd's pie...
The Recipe:
1/4 cup fine dry bread crumbs
1/2 cup milk
1 pound ground round
1 teaspoon salt
1/4 teaspoon pepper
2 tablespoons minced onion (1/2 small onion)
1 large egg
prepared mashed potatoes, about 2 to 4 cups
3/4 cup shredded sharp Cheddar cheese
paprika, optional
1. Soak bread crumbs in milk
2. Mix ground beef, salt, pepper, onion, bread crumb-milk mixture, and egg
3. Spread in a 9-inch pie plate. Bake at 350° for 35 minutes
4. While cooking, you have time to prepare the mashed potatoes
5. Top with mashed potatoes, paprika if desired, and sprinkle with cheese
6. Return to oven for 10 minutes longer, or until cheese is melted and potatoes are thoroughly heated
Serves 4
My Experience:
Quick and easy to make! Not too many ingredients to have to worry about. You could probably replace the bread crumbs with crushed up soda crackers if you don't have any. Other than that, most people would have all ingredients on hand.
I like shepherd's pie, I love this awesome twist!
The Ratings:
My rating: 8/10
The Recipe:
1/4 cup fine dry bread crumbs
1/2 cup milk
1 pound ground round
1 teaspoon salt
1/4 teaspoon pepper
2 tablespoons minced onion (1/2 small onion)
1 large egg
prepared mashed potatoes, about 2 to 4 cups
3/4 cup shredded sharp Cheddar cheese
paprika, optional
1. Soak bread crumbs in milk
2. Mix ground beef, salt, pepper, onion, bread crumb-milk mixture, and egg
3. Spread in a 9-inch pie plate. Bake at 350° for 35 minutes
4. While cooking, you have time to prepare the mashed potatoes
5. Top with mashed potatoes, paprika if desired, and sprinkle with cheese
6. Return to oven for 10 minutes longer, or until cheese is melted and potatoes are thoroughly heated
Serves 4
My Experience:
Quick and easy to make! Not too many ingredients to have to worry about. You could probably replace the bread crumbs with crushed up soda crackers if you don't have any. Other than that, most people would have all ingredients on hand.
I like shepherd's pie, I love this awesome twist!
The Ratings:
My rating: 8/10
Tuesday, November 22, 2011
Roast Chicken
So I don't really have a recipe for this one. It was a guestimation and creativity on my part but I will give you the ingredients I used and cooking instructions.
The Recipe:
Paprika
Poultry seasoning
Parsley
Thyme
Rosemary
Basil
Chili powder
Olive oil
Small whole chicken
1. In a small bowl, mix the seasonings together. I would suggest equal parts of everything (less for chili powder if you don't like spicy/hot)
2. Using your hand, cover chicken with a thin coat of olive oil
3. Rub seasoning mix onto chicken to cover skin. Salt and pepper to taste
4. Preheat oven to 375F. Cook for about 1 and a half to 2 hours, until meat thermometer reads 180 in the thickest part without touching bone
5. Let chicken stand 10 minutes before carving

My Experience:
I made a similar recipe a couple months ago and can't find the recipe I used so I just made my own up and thought I would post it anyways.
If you try it, good luck. This one tasted really good and the left overs will make for great sandwiches.
The Ratings:
My rating: 8/10
The Recipe:
Paprika
Poultry seasoning
Parsley
Thyme
Rosemary
Basil
Chili powder
Olive oil
Small whole chicken
1. In a small bowl, mix the seasonings together. I would suggest equal parts of everything (less for chili powder if you don't like spicy/hot)
2. Using your hand, cover chicken with a thin coat of olive oil
3. Rub seasoning mix onto chicken to cover skin. Salt and pepper to taste
4. Preheat oven to 375F. Cook for about 1 and a half to 2 hours, until meat thermometer reads 180 in the thickest part without touching bone
5. Let chicken stand 10 minutes before carving
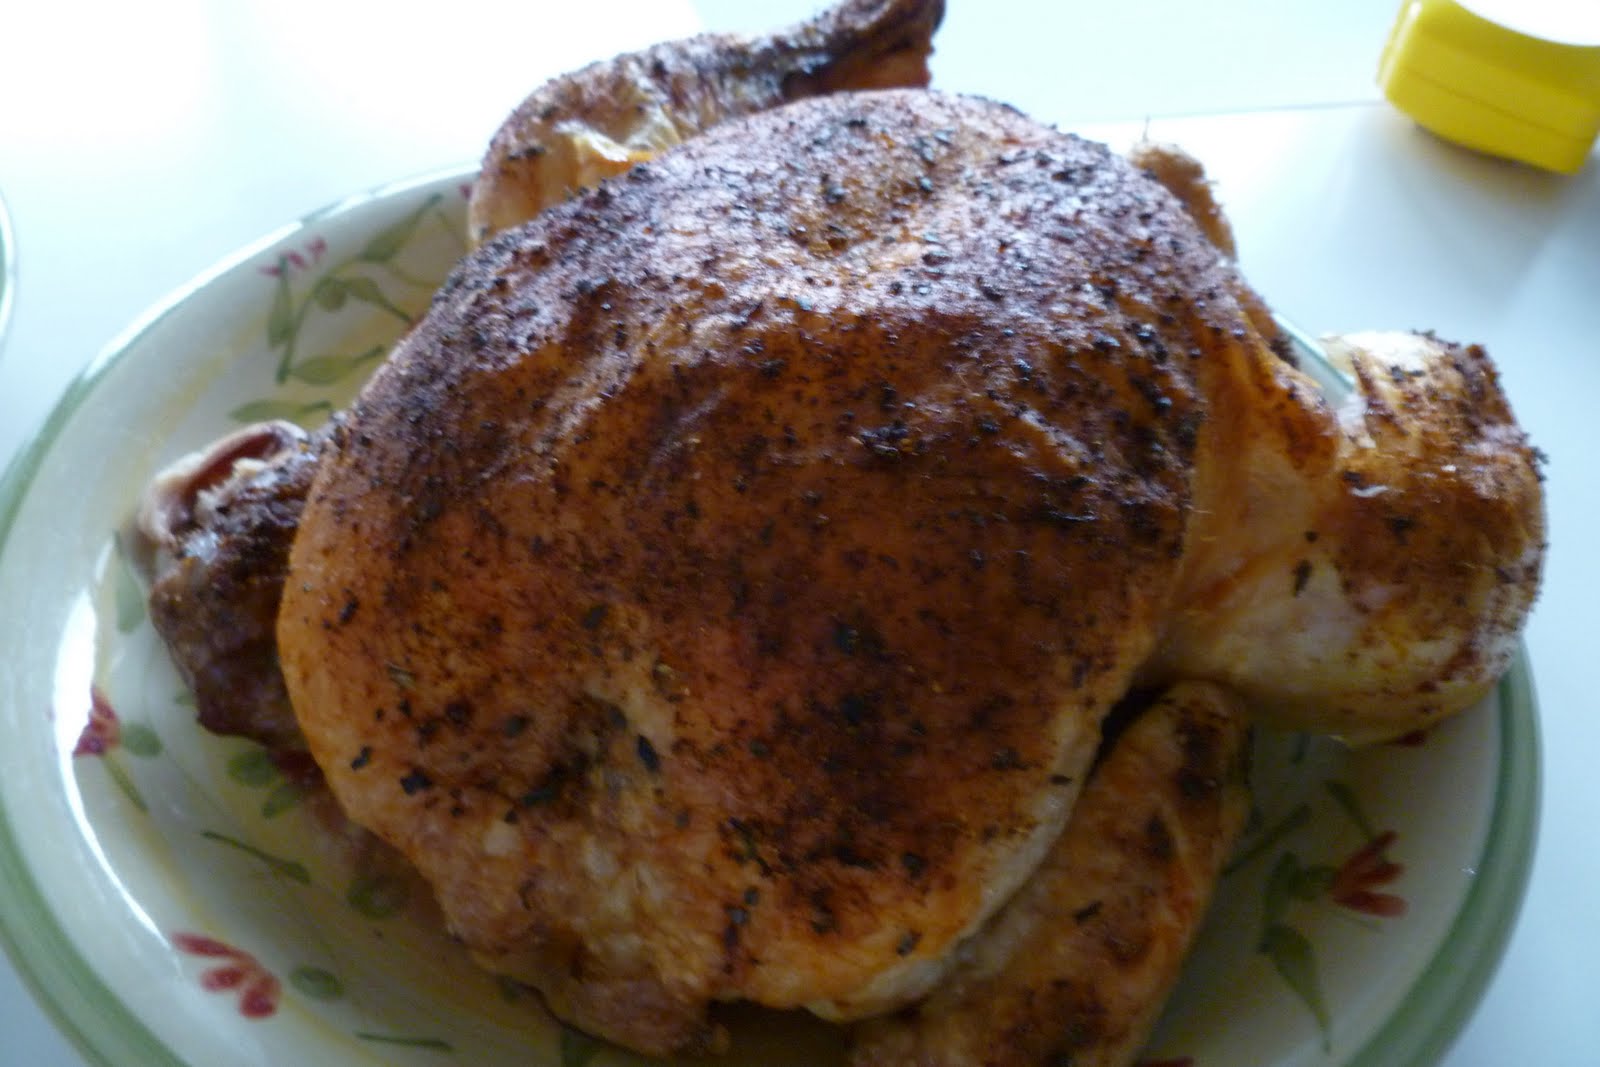
My Experience:
I made a similar recipe a couple months ago and can't find the recipe I used so I just made my own up and thought I would post it anyways.
If you try it, good luck. This one tasted really good and the left overs will make for great sandwiches.
The Ratings:
My rating: 8/10
Monday, November 21, 2011
Sausage Stir-Fry
Wanted to try something new with sausages and this is what I found.
The Recipe:
1 lb smoked sausage
5 carrots, cut in strips
4 celery stalks, cut in strips
2 onions, cut in wedges
1 stalk broccoli, strips and flowerets
1/3 cauliflower, in flowerets
1 red or green pepper, sliced
5 pkg Ramen noddles
Soy sauce or sweet and sour sauce
1. Cut sausage into 4 long pieces, then slice through to make pie shaped pieces
2. Saute sausage in large serving pan
3. Add vegetables and saute
4. Cover and steam
5. Meanwhile, boil 2 to 3 quarts water in a second pan and add Ramen noodles. Cook no longer than 5 minutes
6. Pour noodles in with meat and vegetables
7. Serve with soy sauce or sweet and sour sauce
My Experience:
I actually just used Italian sausages rather than the smoked sausage because that is what I had. I also boiled the sausages for a bit to tenderize the skin a little, then I sliced it and sauted it.
Also, I diced all of the vegetables rather than cutting in slices and I didn't measure the amount since I was only cooking for 2 and estimated what we would eat, allowing for a bit of left overs.
Instead of Ramen noodles, I just used penne since I had some in the cupboard and did not feel like going to the grocery store.
I used the soy sauce and it was really good. It was a nice change to my usual fried sausage with rice routine.
The Ratings:
My rating: 8.5/10
The Recipe:
1 lb smoked sausage
5 carrots, cut in strips
4 celery stalks, cut in strips
2 onions, cut in wedges
1 stalk broccoli, strips and flowerets
1/3 cauliflower, in flowerets
1 red or green pepper, sliced
5 pkg Ramen noddles
Soy sauce or sweet and sour sauce
1. Cut sausage into 4 long pieces, then slice through to make pie shaped pieces
2. Saute sausage in large serving pan
3. Add vegetables and saute
4. Cover and steam
5. Meanwhile, boil 2 to 3 quarts water in a second pan and add Ramen noodles. Cook no longer than 5 minutes
6. Pour noodles in with meat and vegetables
7. Serve with soy sauce or sweet and sour sauce
My Experience:
I actually just used Italian sausages rather than the smoked sausage because that is what I had. I also boiled the sausages for a bit to tenderize the skin a little, then I sliced it and sauted it.
Also, I diced all of the vegetables rather than cutting in slices and I didn't measure the amount since I was only cooking for 2 and estimated what we would eat, allowing for a bit of left overs.
Instead of Ramen noodles, I just used penne since I had some in the cupboard and did not feel like going to the grocery store.
I used the soy sauce and it was really good. It was a nice change to my usual fried sausage with rice routine.
The Ratings:
My rating: 8.5/10
Maple Salmon
If you are a true Canadian, you love maple syrup and you may just love this recipe.
The Recipe:
1/4 cup maple syrup
2 tablespoons soy sauce
1 clove garlic, minced
1/4 teaspoon garlic salt
1/8 teaspoon ground black pepper
1 pound salmon
1. In a small bowl, mix the maple syrup, soy sauce, garlic, garlic salt and pepper.
2. Place salmon in a shallow baking dish, and coat with the maple syrup mixture. Cover the dish and marinate salmon in the refridgerator for 30 minutes, turning once.
3. Preheat oven to 400 degrees F
4. Place the baking dish in the preheated oven, bake uncovered for 20 minutes, or until easily flaked with a fork
My Experience:
Awesome new twist to baked salmon. It was easy to make and very yummy. Even my kitten loved the salmon.
I was concerned at first at what the maple syrup with soy sauce would taste like but it was fantastic.
When Sam found this recipe online and read me the directions, he had told me to preheat the oven to 200 (without reading the C part). This lead to a longer cook time (about half an hour) but it still turned out great. Probably would have been crispier if cooked at the 400F (I LOVE crispy salmon).
I also made steamed vegetables as a side (celery, broccoli, cauliflower, carrots, red pepper, onion) and used the left over marinate as a dressing for the vegetables to tie in the flavours together. It worked wonderfully. The other side was garlic rice to bring out the garlic in the salmon.
The Ratings:
Sam's rating: simple said it was really good (he isn't as into the blogging as I am lol)
My rating: 9.5/10
The Recipe:
1/4 cup maple syrup
2 tablespoons soy sauce
1 clove garlic, minced
1/4 teaspoon garlic salt
1/8 teaspoon ground black pepper
1 pound salmon
1. In a small bowl, mix the maple syrup, soy sauce, garlic, garlic salt and pepper.
2. Place salmon in a shallow baking dish, and coat with the maple syrup mixture. Cover the dish and marinate salmon in the refridgerator for 30 minutes, turning once.
3. Preheat oven to 400 degrees F
4. Place the baking dish in the preheated oven, bake uncovered for 20 minutes, or until easily flaked with a fork
My Experience:
Awesome new twist to baked salmon. It was easy to make and very yummy. Even my kitten loved the salmon.
I was concerned at first at what the maple syrup with soy sauce would taste like but it was fantastic.
When Sam found this recipe online and read me the directions, he had told me to preheat the oven to 200 (without reading the C part). This lead to a longer cook time (about half an hour) but it still turned out great. Probably would have been crispier if cooked at the 400F (I LOVE crispy salmon).
I also made steamed vegetables as a side (celery, broccoli, cauliflower, carrots, red pepper, onion) and used the left over marinate as a dressing for the vegetables to tie in the flavours together. It worked wonderfully. The other side was garlic rice to bring out the garlic in the salmon.
The Ratings:
Sam's rating: simple said it was really good (he isn't as into the blogging as I am lol)
My rating: 9.5/10
Sunday, December 19, 2010
Macadamia- Coconut Clusters
Mmmm coconut... Made these especially for Joelle and she loved them :) pretty easy to make too!
The Recipe:
For the clusters:
1 package sweetened flaked coconut, lightly toasted (about 2 2/3 cups)
1 jar dry-roasted, salted macadamia nuts, coarsly chopped (about 2 cups)
8 squares (8 ounces) semisweet chocolate
8 squares (8 ounces) white chocolate
For the glaze:
2 squares (2 ounces) semisweet chocolate
2 squares (2 ounces) white chocolate
1 tablespoon vegetable shortening
Special aids:
4 miniature muffin tins
miniature paper or foil candy cups
small resealable plastic bags
Making the Clusters
1. Line four miniature muffin pans with candy cups; set aside.
2. In a medium-sized bowl, combine half of the coconut and half of the macadamia nuts. In another medium-sized bowl, combine the rest of the coconut and macademia nuts.
3. In a small microwave-safe bowl, microwave white chocolate on HIGH for about 2 minutes. Stir until the chocolate is melted and smooth, reheating for 30 seconds, if necessary.
4. Stir the melted chocolate into one bowl of the coconut mixture, stirring to coat. Drop mixture by heaping teaspoonfuls to fill each candy cup in two pans.
5. Refrigerate until set, about 45 minutes.
6. In same microwave-safe bowl, microwave semisweet chocolate on HIGH for about 2 minutes; stir until melted and smooth.
7. Stir melted chocolate into remaining bowl of coconut mixture; stir to coat.
8. Drop by heaping teaspoonfuls to fill candy cups in remaining 2 pans.
9. Refrigerate until set, about 45 minutes.
Making the Glaze
1. In a small microwave-safe bowl, combine the white chocolate and shortening. Microwave on HIGH for 2 minutes; stir until chocolate is melted and smooth. Let cool slightly; pour into a resealable bag.
2. Remove semisweet chocolate nut clusters from candy cups; transfer them to an ungreased baking sheet. Snip off one corner from the bag of white chocolate; drizzle over the semisweet clusters.
3. In same microwave-safe bowl as step 1, microwave the semisweet chocolate on HIGH for 2 minutes; stir until chocolate is melted and smooth. Combine leftover white chocolate glaze. Let cool slightly; pour into a resealable bag.
4. Remove white chocolate nut clusters from candy cups; transfer them to an ungreased baking sheet. Snip off one corner from the bag of chocolate; drizzle over the white chocolate clusters.
5. Refrigerate all the clusters until glaze sets, about 15 minutes.

My Experience:
I included the few adjustments I made from the original recipe to this version (such as using the same microwave-save bowl, and the order of which to make to reduce dishes!).
All in all, pretty simple to make. Dishes are a bit of a bugger because it is melted chocolate but as long as you don't let it sit too long, it's not that bad.
Make sure you have a lot of fridge space for the cooling periods because it does take up a lot of room. For quicker chill times, try using the freezer.
The Ratings:
Joelle's rating: 10/10 for semisweet, 12/10 for white chocolate (she says "SEIGNEUR QUE CEST BON!")
My rating: 10/10
The Recipe:
For the clusters:
1 package sweetened flaked coconut, lightly toasted (about 2 2/3 cups)
1 jar dry-roasted, salted macadamia nuts, coarsly chopped (about 2 cups)
8 squares (8 ounces) semisweet chocolate
8 squares (8 ounces) white chocolate
For the glaze:
2 squares (2 ounces) semisweet chocolate
2 squares (2 ounces) white chocolate
1 tablespoon vegetable shortening
Special aids:
4 miniature muffin tins
miniature paper or foil candy cups
small resealable plastic bags
Making the Clusters
1. Line four miniature muffin pans with candy cups; set aside.
2. In a medium-sized bowl, combine half of the coconut and half of the macadamia nuts. In another medium-sized bowl, combine the rest of the coconut and macademia nuts.
3. In a small microwave-safe bowl, microwave white chocolate on HIGH for about 2 minutes. Stir until the chocolate is melted and smooth, reheating for 30 seconds, if necessary.
4. Stir the melted chocolate into one bowl of the coconut mixture, stirring to coat. Drop mixture by heaping teaspoonfuls to fill each candy cup in two pans.
5. Refrigerate until set, about 45 minutes.
6. In same microwave-safe bowl, microwave semisweet chocolate on HIGH for about 2 minutes; stir until melted and smooth.
7. Stir melted chocolate into remaining bowl of coconut mixture; stir to coat.
8. Drop by heaping teaspoonfuls to fill candy cups in remaining 2 pans.
9. Refrigerate until set, about 45 minutes.
Making the Glaze
1. In a small microwave-safe bowl, combine the white chocolate and shortening. Microwave on HIGH for 2 minutes; stir until chocolate is melted and smooth. Let cool slightly; pour into a resealable bag.
2. Remove semisweet chocolate nut clusters from candy cups; transfer them to an ungreased baking sheet. Snip off one corner from the bag of white chocolate; drizzle over the semisweet clusters.
3. In same microwave-safe bowl as step 1, microwave the semisweet chocolate on HIGH for 2 minutes; stir until chocolate is melted and smooth. Combine leftover white chocolate glaze. Let cool slightly; pour into a resealable bag.
4. Remove white chocolate nut clusters from candy cups; transfer them to an ungreased baking sheet. Snip off one corner from the bag of chocolate; drizzle over the white chocolate clusters.
5. Refrigerate all the clusters until glaze sets, about 15 minutes.

My Experience:
I included the few adjustments I made from the original recipe to this version (such as using the same microwave-save bowl, and the order of which to make to reduce dishes!).
All in all, pretty simple to make. Dishes are a bit of a bugger because it is melted chocolate but as long as you don't let it sit too long, it's not that bad.
Make sure you have a lot of fridge space for the cooling periods because it does take up a lot of room. For quicker chill times, try using the freezer.
The Ratings:
Joelle's rating: 10/10 for semisweet, 12/10 for white chocolate (she says "SEIGNEUR QUE CEST BON!")
My rating: 10/10
Lemon Sugar Cookies
I like lemon, I like sugar cookies... so I figured these would be a good choice for Christmas cookies :) The recipe is from the Holiday Cheer edition of Good Housekeeping magazine.
The Recipe:
1 1/5 cups (3 sticks) unsalted butter, softened
1 cup sugar
1 large egg
2 1/2 teaspoon lemon extract
1 teaspoon vanilla extract
1/2 teaspoon salt
4 cups all-purpose flour
1. In a large bowl, beat butter and sugar until fluffy. Beat in egg, lemon and vanilla extracts, and salt.
2. With a mixer on low speed, beat in flour in 2 additions until blended.
3. Divide dough into thirds; shape each into a disk and wrap in plastic wrap. Refrigerate until firm enough to roll, about 2 hours.
4. Preheat over to 350F.
5. Roll 1 piece of dough at a time, on a lightly floured surface with a floured rolling pin, 10 1/4-inch thickness.
6. Cut out desired shapes with cookie cutters; re-roll scraps.
7. Place 1 1/2 inches apart on ungreased cookie sheets.
8. Bake 8 to 10 minutes, or until golden. Cool on wire racks. Decorate as you like using ornamental frosting.

My Experience:
So I've discovered I don't like rolling dough! It's an unnecessary pain. Next time I'll just do them as mostly drop cookies with a few cutouts so that they are pretty.
Other than that, they were pretty simple and straight-forward to make. And best part, they are yummy :)
This recipe makes about 6 dozen depending on the size of your cutouts.
I will soon be posting the frosting recipe that I used from the same magazine so keep an eye out for that.
The Ratings:
Joelle's rating: 9/10
My rating: 9/10 for taste, 6/10 for pain in the ass due to rolling!
The Recipe:
1 1/5 cups (3 sticks) unsalted butter, softened
1 cup sugar
1 large egg
2 1/2 teaspoon lemon extract
1 teaspoon vanilla extract
1/2 teaspoon salt
4 cups all-purpose flour
1. In a large bowl, beat butter and sugar until fluffy. Beat in egg, lemon and vanilla extracts, and salt.
2. With a mixer on low speed, beat in flour in 2 additions until blended.
3. Divide dough into thirds; shape each into a disk and wrap in plastic wrap. Refrigerate until firm enough to roll, about 2 hours.
4. Preheat over to 350F.
5. Roll 1 piece of dough at a time, on a lightly floured surface with a floured rolling pin, 10 1/4-inch thickness.
6. Cut out desired shapes with cookie cutters; re-roll scraps.
7. Place 1 1/2 inches apart on ungreased cookie sheets.
8. Bake 8 to 10 minutes, or until golden. Cool on wire racks. Decorate as you like using ornamental frosting.

My Experience:
So I've discovered I don't like rolling dough! It's an unnecessary pain. Next time I'll just do them as mostly drop cookies with a few cutouts so that they are pretty.
Other than that, they were pretty simple and straight-forward to make. And best part, they are yummy :)
This recipe makes about 6 dozen depending on the size of your cutouts.
I will soon be posting the frosting recipe that I used from the same magazine so keep an eye out for that.
The Ratings:
Joelle's rating: 9/10
My rating: 9/10 for taste, 6/10 for pain in the ass due to rolling!
Subscribe to:
Posts (Atom)